Raytheon Autonomous Drone Project Semester 2

Note: This post is laid out chronologically in order of events starting in January 2022.
Link to Semester 1 post: alex.doud.io/raytheon-drone-project-sem-1/
Background:
A little refresher of where we left off before winter break:
- Build the hexacopter!
- Fly the hexacopter!
- Simulate Challenges 2-4!
- Buy and integrate sensors for Challenges 2-4!
- Make it all work together!
At the end of the fall semester, our Computer Science team attached to us had graduated because their senior design project is only one semester long. This meant we would get a new set of Computer Science team members on the project at the beginning of the Spring semester. The hardware team (everyone who was on the project last semester - 7 members) decided to take this chance to restructure the team. We would now have 12 members on the team split into subteams. The composition of the subteams would look like this:
- General / Challenge 1 - Work on assembling the hexacopter and integrating sensors for other challenges.
- Challenge 2 - Simulate then integrate the OpenCV logo detection software onto the drone, and control the drone effectively.
- Challenge 3/4 - Research solutions for obstacle avoidance then implement them.
The majority of team members are on the teams for Challenges 2-4. Some members, like William Greenfield and I, would work between General/Challenge 1 and the other teams to build and integrate parts onto the drone for each team.
Challenges 3 & 4 ZED Approach:
Over winter break someone on the team found this old ardupilot article on using a ZED stereo camera, Nvidia TX1, and Ardupilot to do visual odometry without a GPS. This means the drone knows where it is relative to obstacles the ZED sees and tries to compensate for its movements in the flight controller automatically.
Originally we thought about using a 2D 360 LiDAR unit on top of the drone to detect and navigate obstacles but the problem with this approach is that this method doesn't work very well for GPS denied flights. The drone wouldn't know where it is relative to things in the world and could drift around.
The ZED implementation seemed like a perfect solution, we could do obstacle avoidance and visual odometry with the high-quality stereo cameras it provides effectively completing Challenges 3 and 4 in one move. But the drawback was that all of the software referenced in the post was depreciated and out of date, effectively unusable. We would have to write our own implementation of the ZED camera, how hard could that be?
Using this information we moved to use an Nvidia TX2 as our companion computer and a ZED 2 for our camera in Challenge 2-4. We also decided to purchase an RPLiDAR A2 unit as a backup for Challenge 3 if our ZED implementation fails.
Simulating Challenges 3 & 4 with LiDAR:
After winter break I resumed working on simulating challenges 3 and 4 (Pool noodle obstacle avoidance). After some trial and error, we got Gazebo running on an old server in the lab with a GTX 760. Our setup is a Poweredge T430 running an Ubunutu 18.04 Proxmox Virtual Machine using Graphics Card pass through, the process for setting this up would be a whole post in itself. We then got SITL Ardupilot and Gazebo plugin bridge running by following their guide here, this means we have a drone in Gazebo we can control with SITL. Next, we created a Gazebo drone that had a 360 LiDAR mounted on it intending to use ardupilot's built-in bendy ruler obstacle avoidance. But we ran into a problem here, while we could control the simulated drone in a 3D world we could not get any LiDAR sensor data from Gazebo into the SITL Ardupilot. So while we had the eyes and the brain of the drone working in Gazebo, we had to build the optic nerve between them.
Initially, I just tried connecting the LiDAR in Gazebo to SITL Ardupilot. I was avoiding using ROS (Robot OS) because it would have been very overkill to set up and run just to pass LiDAR data into SITL. After a bit over a week of researching how to do the backend connections without ROS, I stumbled upon helium, a complete simulation environment using Ardupilot, Gazebo, and ROS. This offered to do all of the backend setup work for me, and enable me to start doing simulated flight tests right away.
This is one of the first flights I had with working obstacle avoidance in Gazebo, the blue circle on top of the drone is the 2D 360 LiDAR vision:
After getting a few successful flights I shifted to using my blender experience to create a custom Gazebo world of a football field we could simulate all of our challenges on. Initially, the football field used a premade field texture, but later on we shifted to a satellite image of the UTA stadium for Challenge 2 Simulation (where our competition would take place).
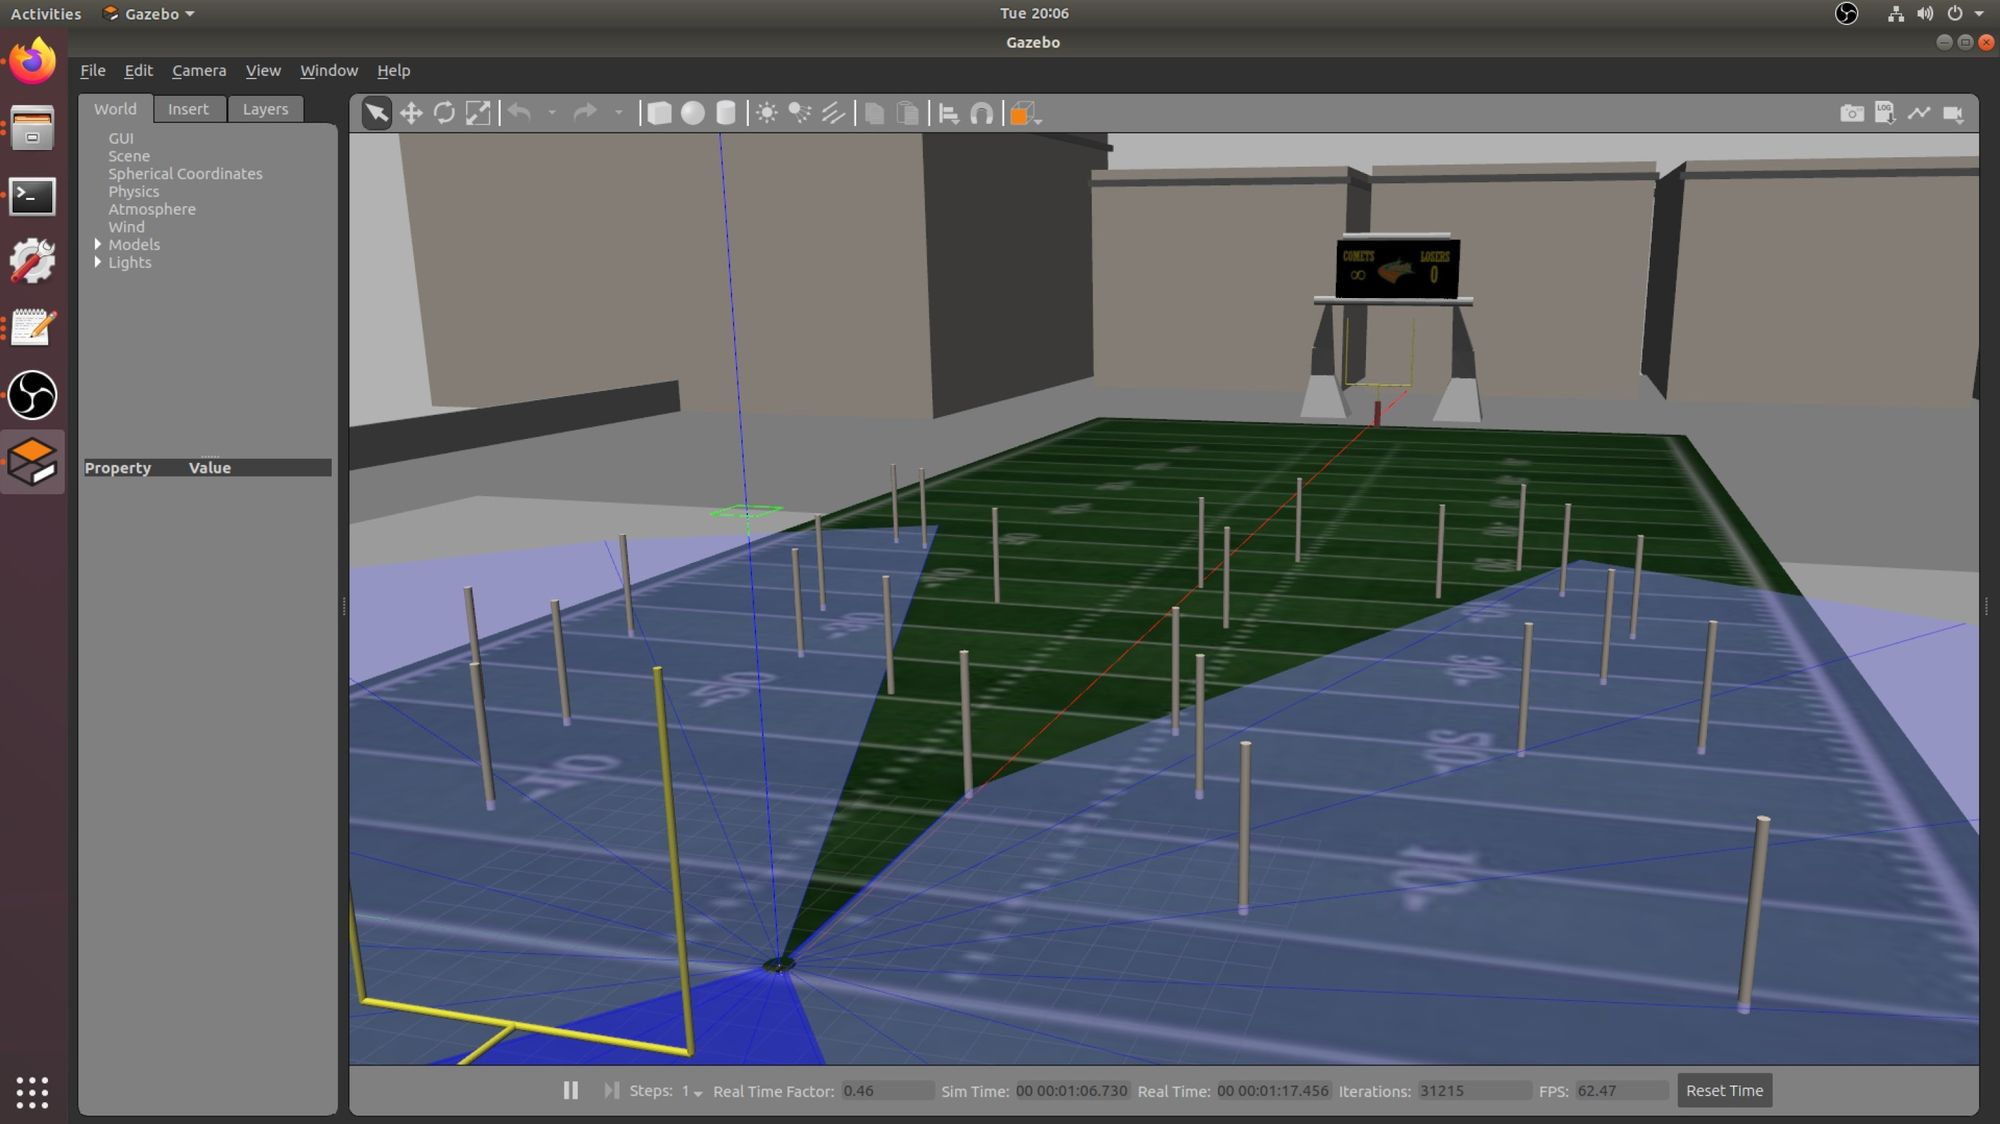
The amazing part of designing the field in blender was using blenders particle/hair system to randomize obstacle placement for us. This allowed me to teach my teammates, who have no 3D experience, how to create new obstacle courses with just a few clicks.
And just because I love <model-viewer> here is our final empty stadium in 3D model form for you to explore, complete with satellite imagery, scoreboard, and goal posts:
So now that we have our flight controller parameters tuned from simulation, we need to test it on an actual drone!
Flight Testing Challenges 3 & 4 with LiDAR:
During this time we were waiting on parts for the hexacopter, so I chose to use an old RP LiDAR A1 we had lying around. It natively integrates into Ardupilot like the LiDAR in simulation. With some CAD and 3D printing, it was mounted to the top.
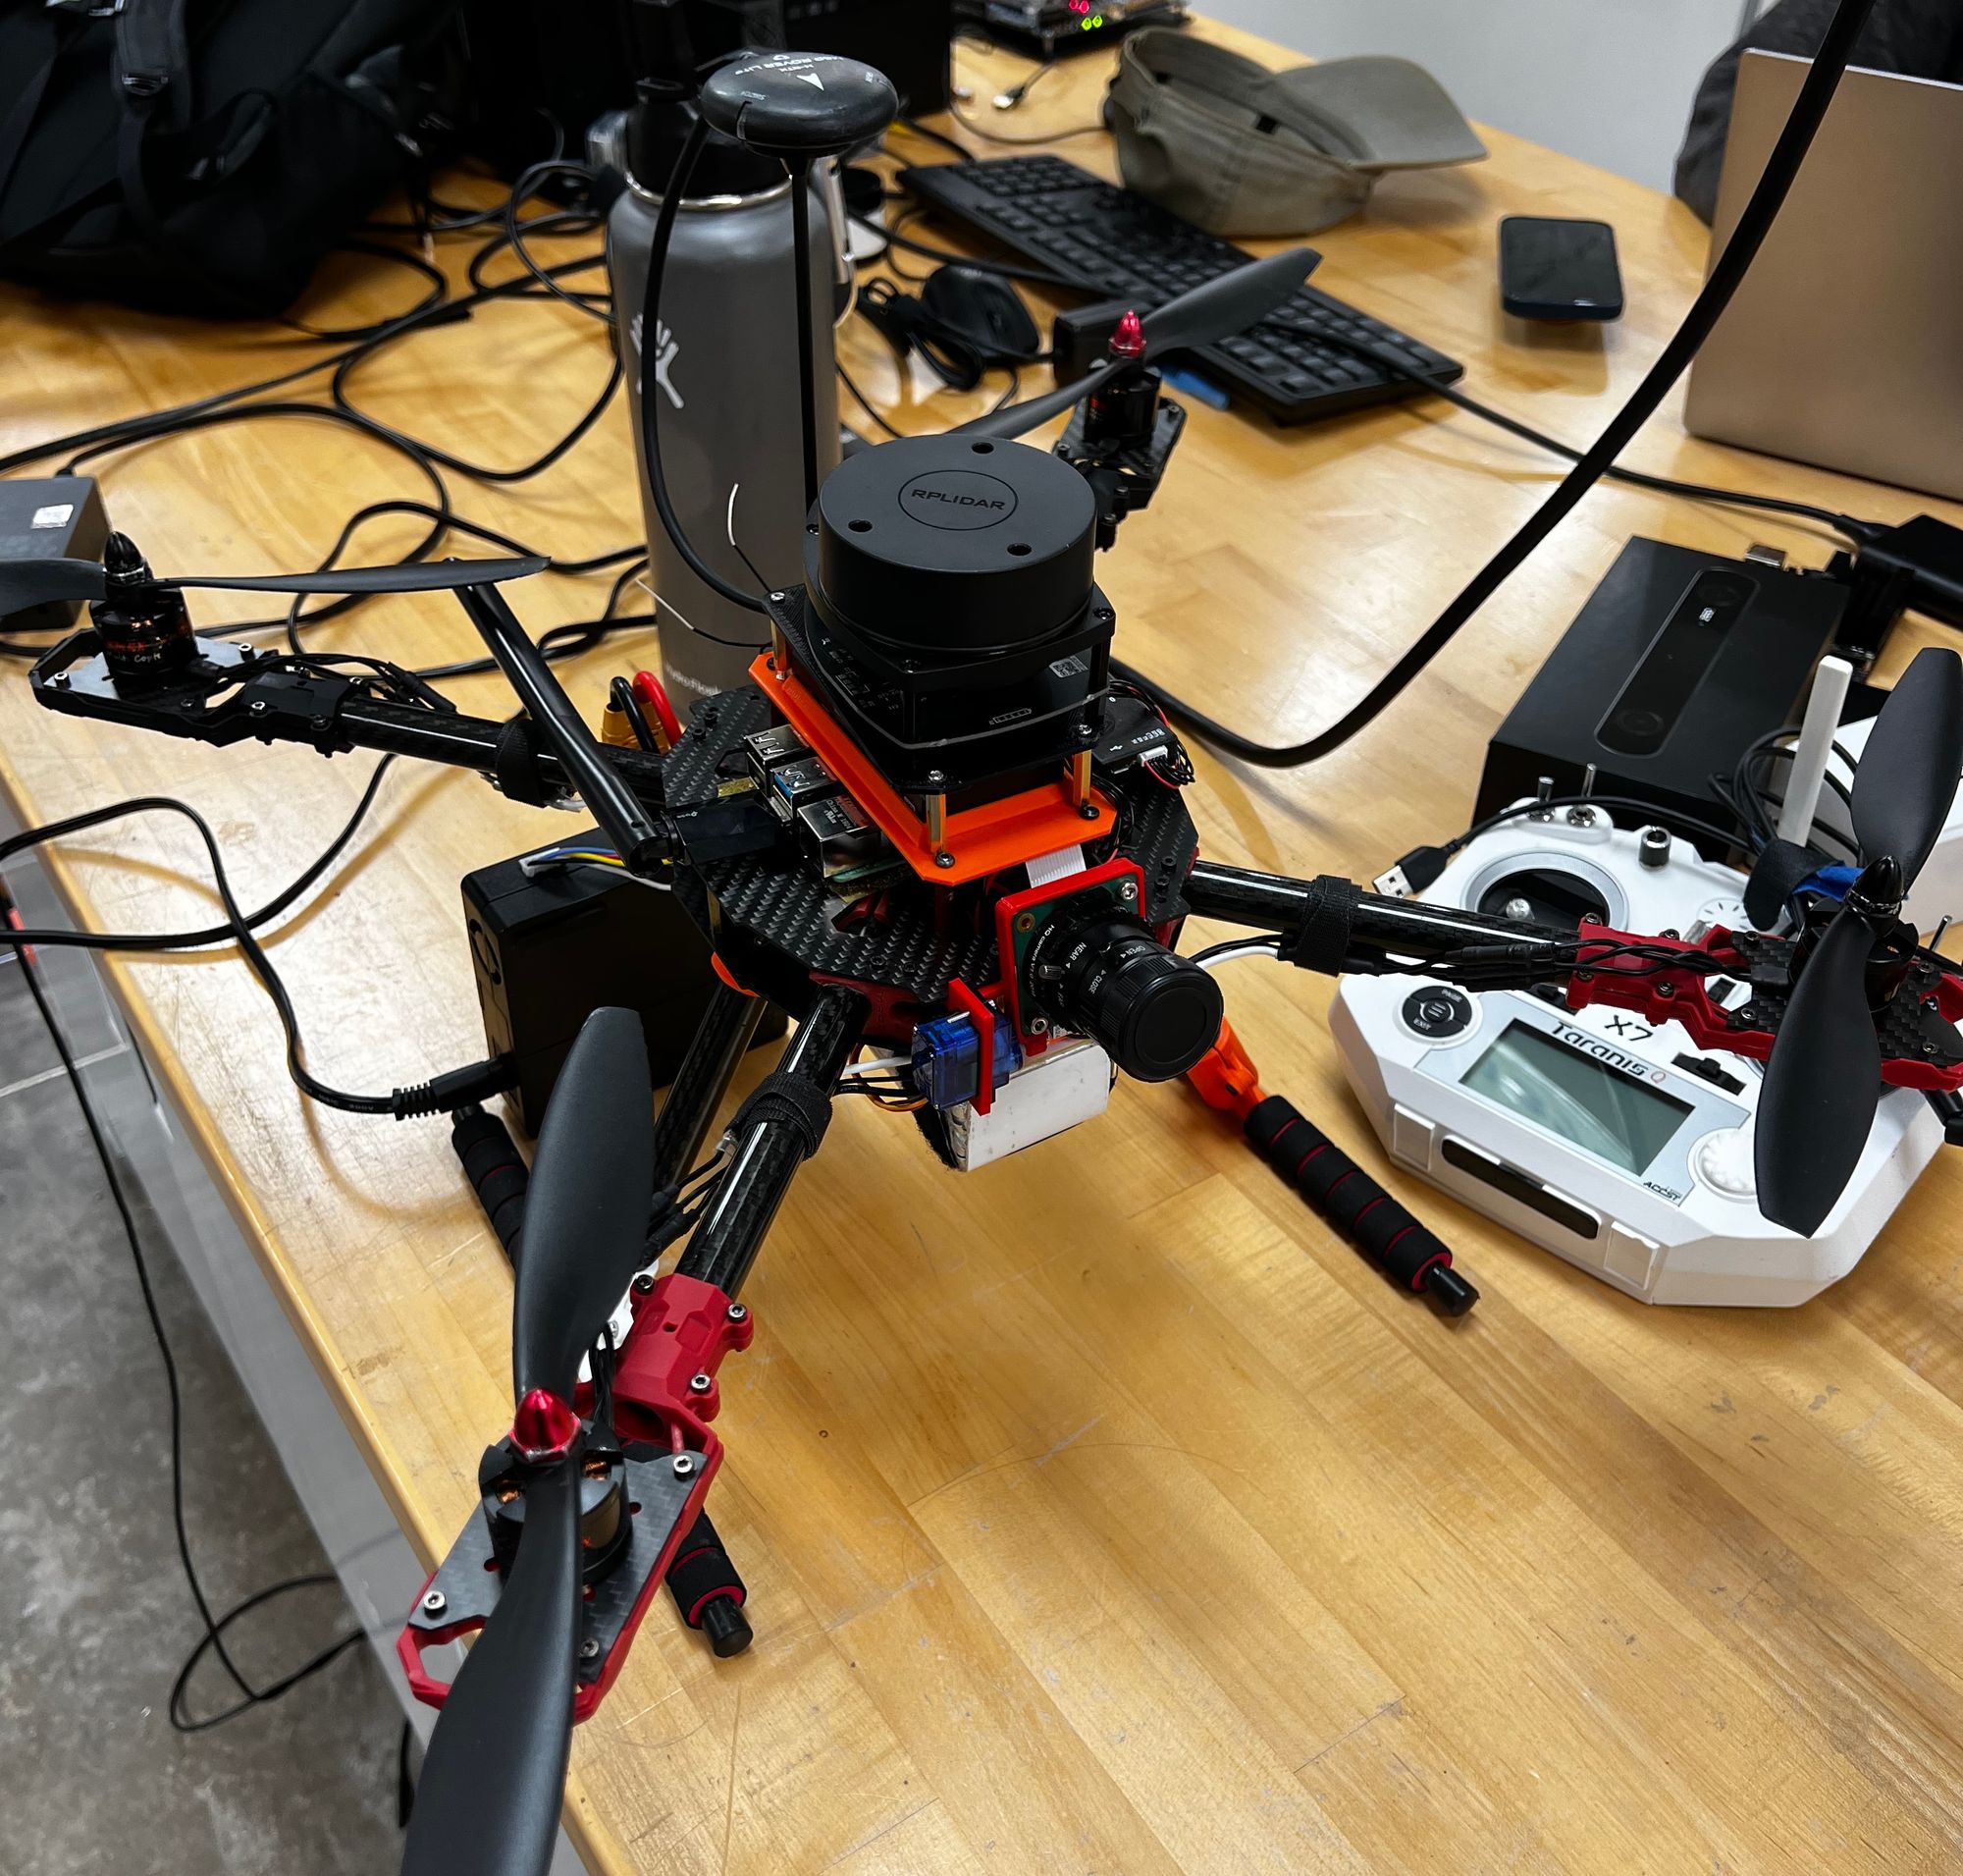
After tuning it with some parameters I got from the simulation, I took it for a flight to try and avoid one pool noodle.
It was successful! But it was also extremely sensitive to sunlight so these test flights could only be done after the sun had gone down.
The performance was good enough for us to justify buying a better LiDAR unit (that could handle the sun) for the hexacopter to backup the ZED in Challenges 3 and 4.
Simulating Challenge 2:
Whilst I was working on our backup for Challenge 3+4, Noah Parker led our development for Challenge 2. It consisted of our 2 FT x 2 FT logo being placed on one half of the football field, and our drone autonomously finding and landing on it.
Because we were searching half of a football field (53 yd x 50 yd) we needed a logo that a camera could detect from far away. After some brainstorming, we settled on an OpenCV Hue-based detection method for far distances, and when the drone is close to our logo it will switch to scanning OpenCV Aruco codes to confirm it is our logo (Aruco codes are like QR codes that cameras can read easily). Since the logo would be on a green football field we chose pink as the contrast color, and we would use 4 Aruco codes to be able to have enough variety so our logo wouldn't be mixed up with other teams.
Noah managed to simulate all of Challenge 2 using helium (ROS, Gazebo, Ardupilot SITL) as I did for Challenge 3+4 LiDAR. He had to modify the drone to have 2 cameras on it, one facing forward at 45° (scanning Hue colors) and another facing down (for scanning Aruco).
Algorithm:
- First, we will take off to the center of the half of the football field with the camera at 45°.
- Do a 360-yaw spin to scan the entirety of the football field around the drone, noting geocoordinates relative to the drone of Hue POIs (positions of interest). It knows a fairly accurate GPS coordinate of the POI by knowing the camera angle, camera lens data, and current drone GPS location from the flight controller.
- Fly to each POI and scan the Aruco code, having the camera facing down.
- If it's our logo then land! If not repeat step 3.
Here is the final simulation running in Gazebo before we switched to hardware testing: (I suggest running this at 2x speed)
Hexacopter Build:
Last semester we had a decent grasp on what parts we wanted in some spots, but now that we got simulations running and a good grasp on our approaches we finalized the parts list. We started ordering many of these parts in November because of supply chain issues, trying to make sure we would get our Motors, ESCs, and sensors on time.
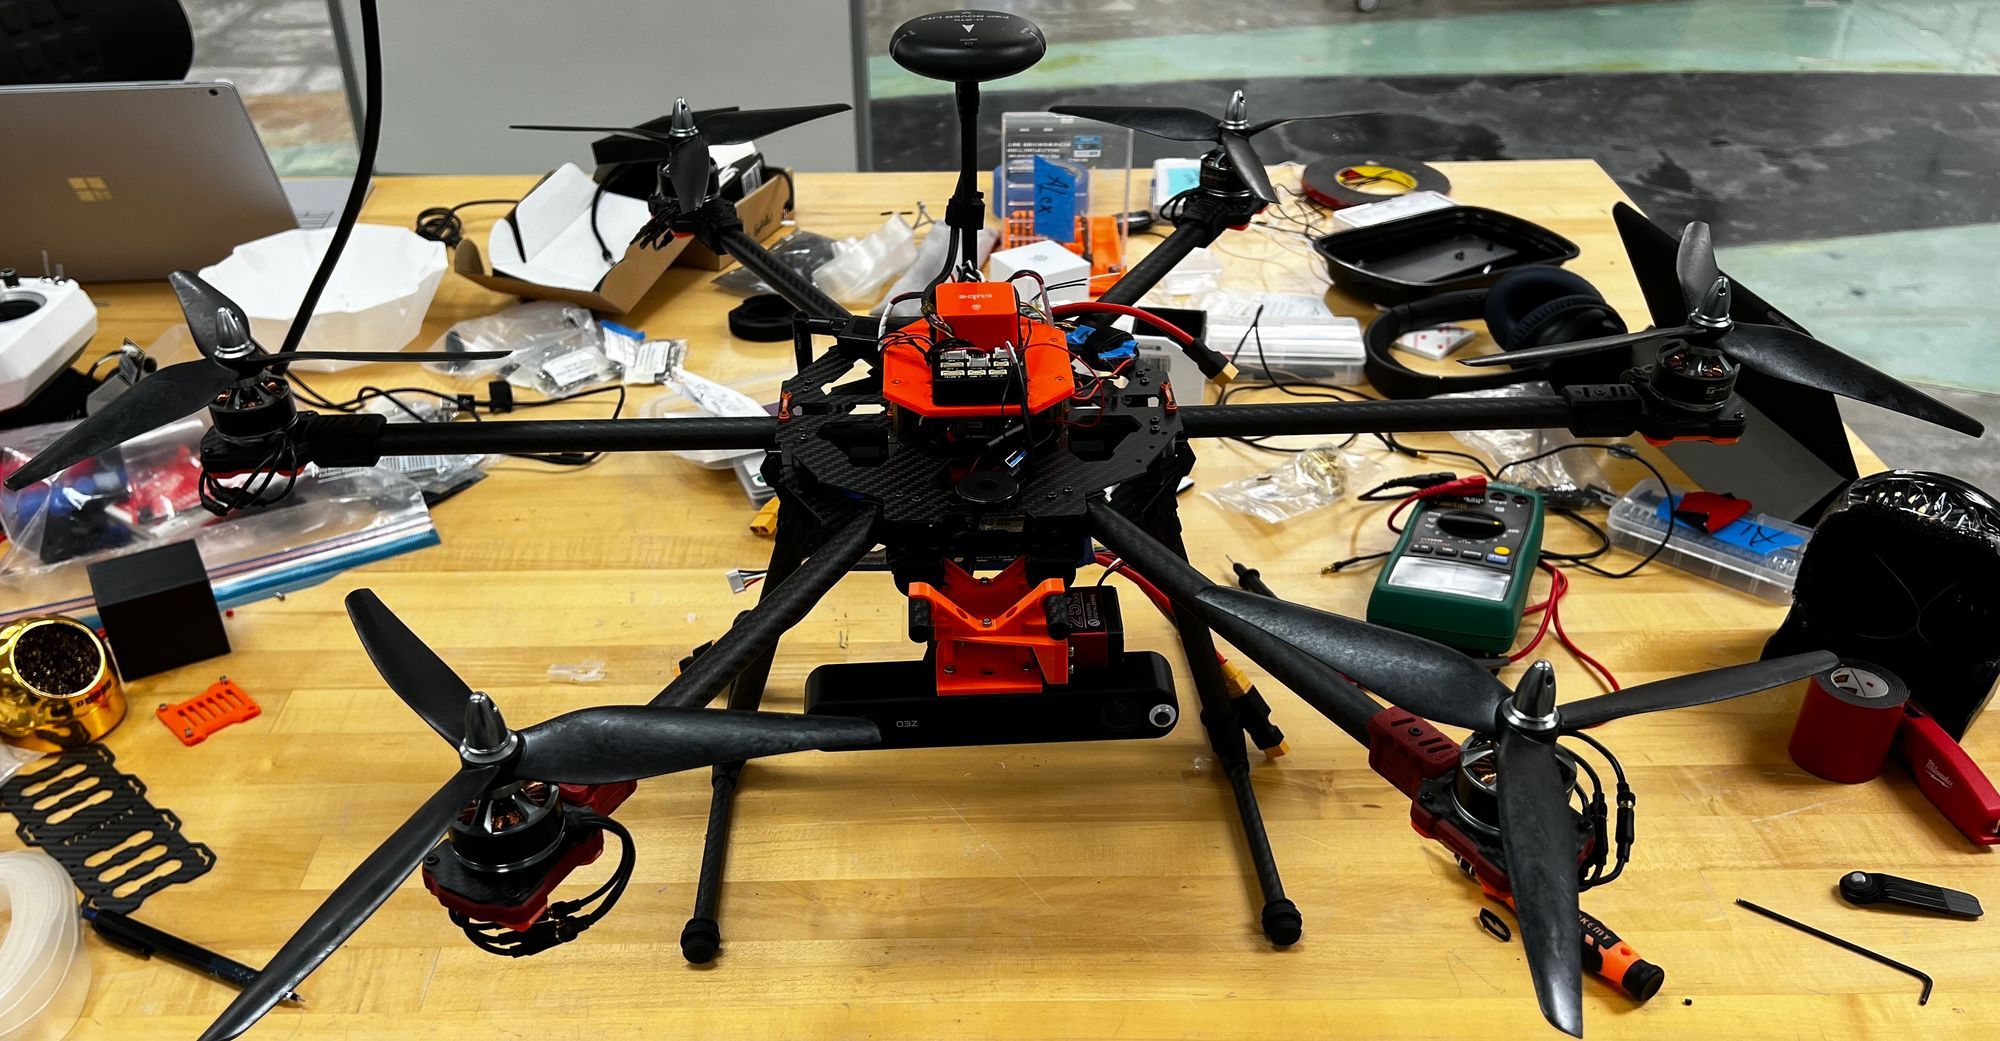
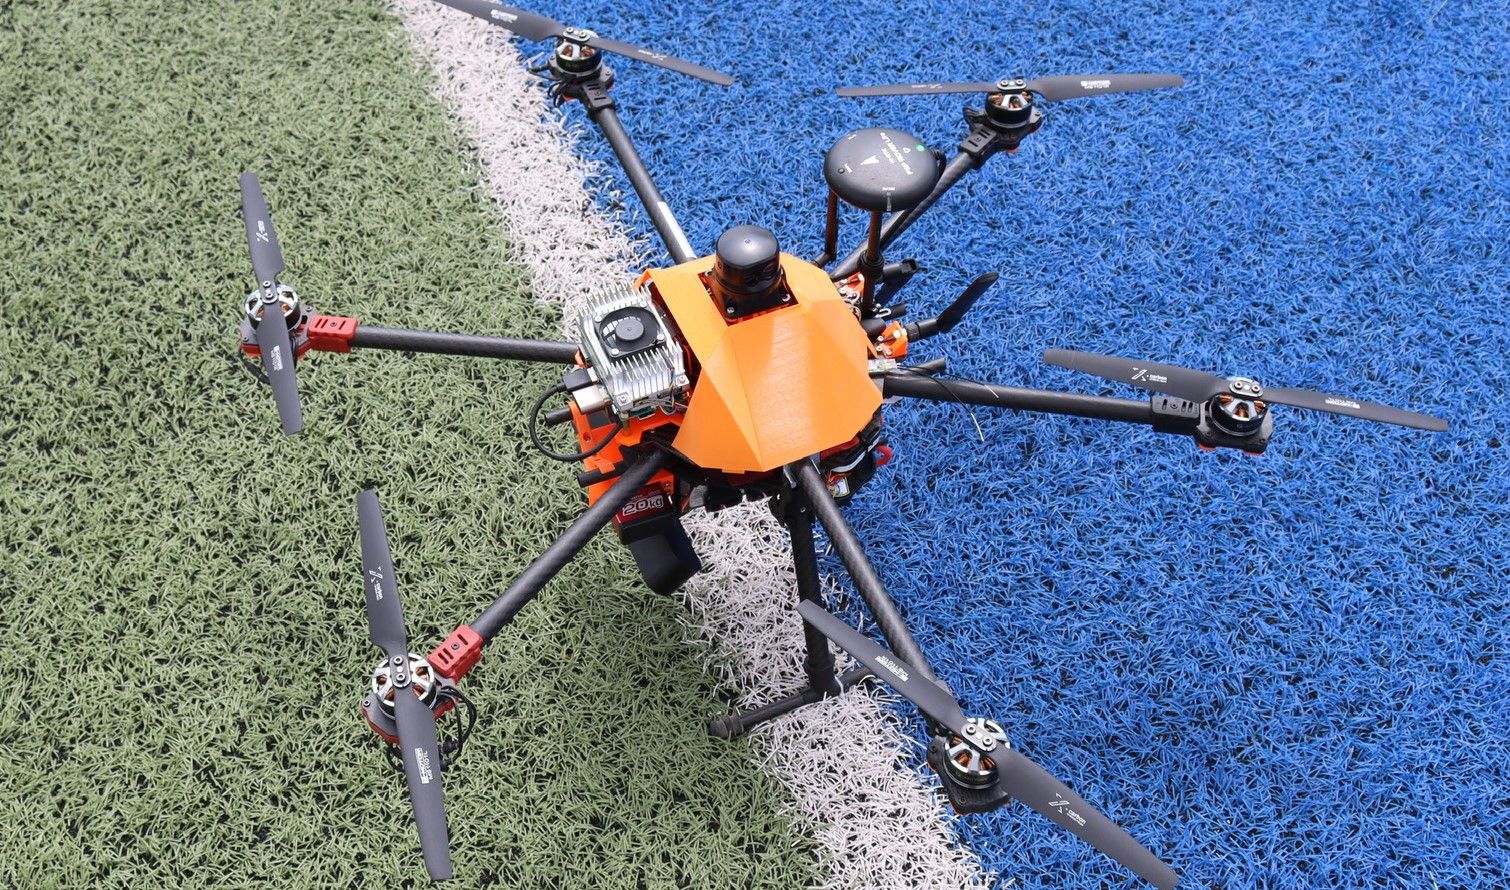
Our final hexacopter consists of these components:
- Flight Controller - Cube Orange with Ardupilot firmware
- GPS - Holybro UBLOX F8P RTK GPS
- ESCs - EMAX Formula Series 32Bit 45A ESC
- Motors - T-Motor NM3110-15 780kv
- Power Distribution Board (PDB) - Generic PDB for a hex/octocopter that also provided our flight controller with current and voltage readouts.
- Frame - Originally DJI F550 Hex frame but quickly switched to a Tarot FY690S for better sensor mounting
- Battery - 2x 4S 5000 mAh LiPo in parallel
- Radio Receiver - Frsky XM+
- Telemetry Transmitter - Holybro SiK Telemetry Radio V3
- Companion Computer - Nvidia Jetson TX2 with an Orbitty Carrier board, and a backup Jetson Nano in case our TX2 broke
- On-board camera - ZED 2 on an articulating servo mount
- LiDAR - Initially RPLiDAR A2, Later switched to Lightware SF45/B
- Altimeter - Downward facing Lightware SF11/C LiDAR
Learning from our Quad I drew up a wiring schematic for the Hex. This was important to know which sensor connects to which port on the flight controller, which can get very confusing very quickly. All of the blue lines have an internal firmware name typically corresponding to a different name than what is listed on the flight controller.
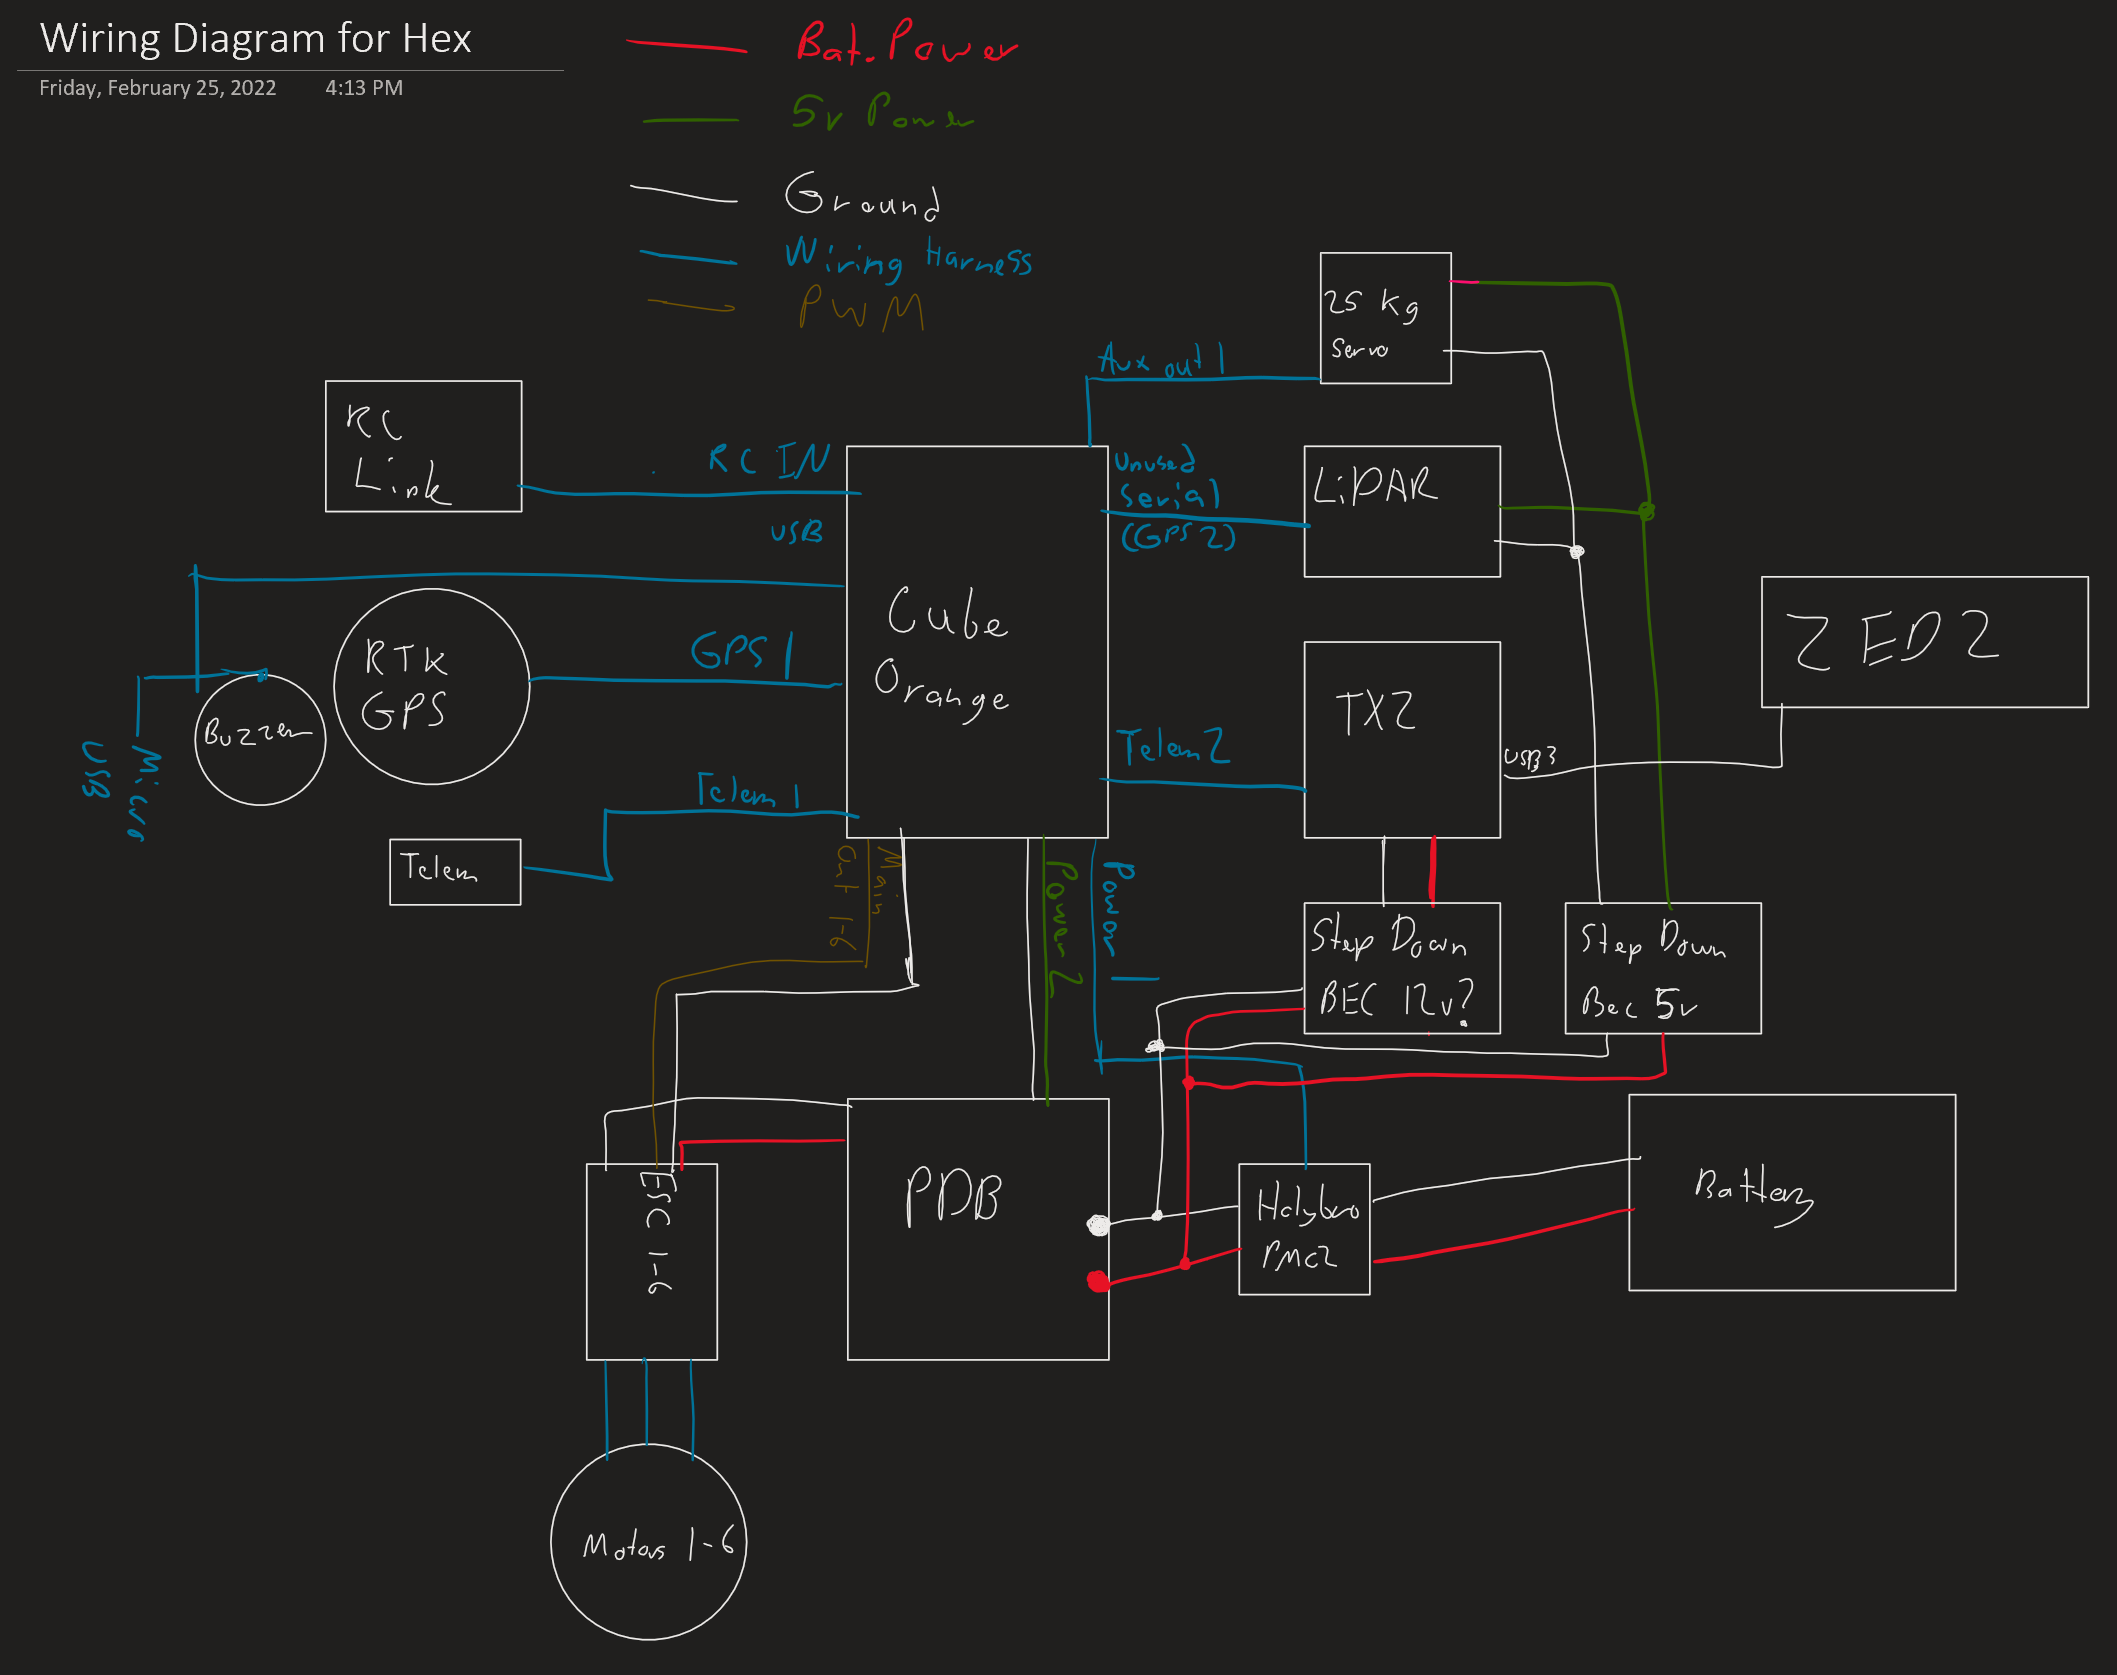
The only thing different on the actual drone compared to the wiring diagram is that each thing requiring a BEC had its own instead of them sharing them. The BECs didn't provide enough current to power two sensors simultaneously.
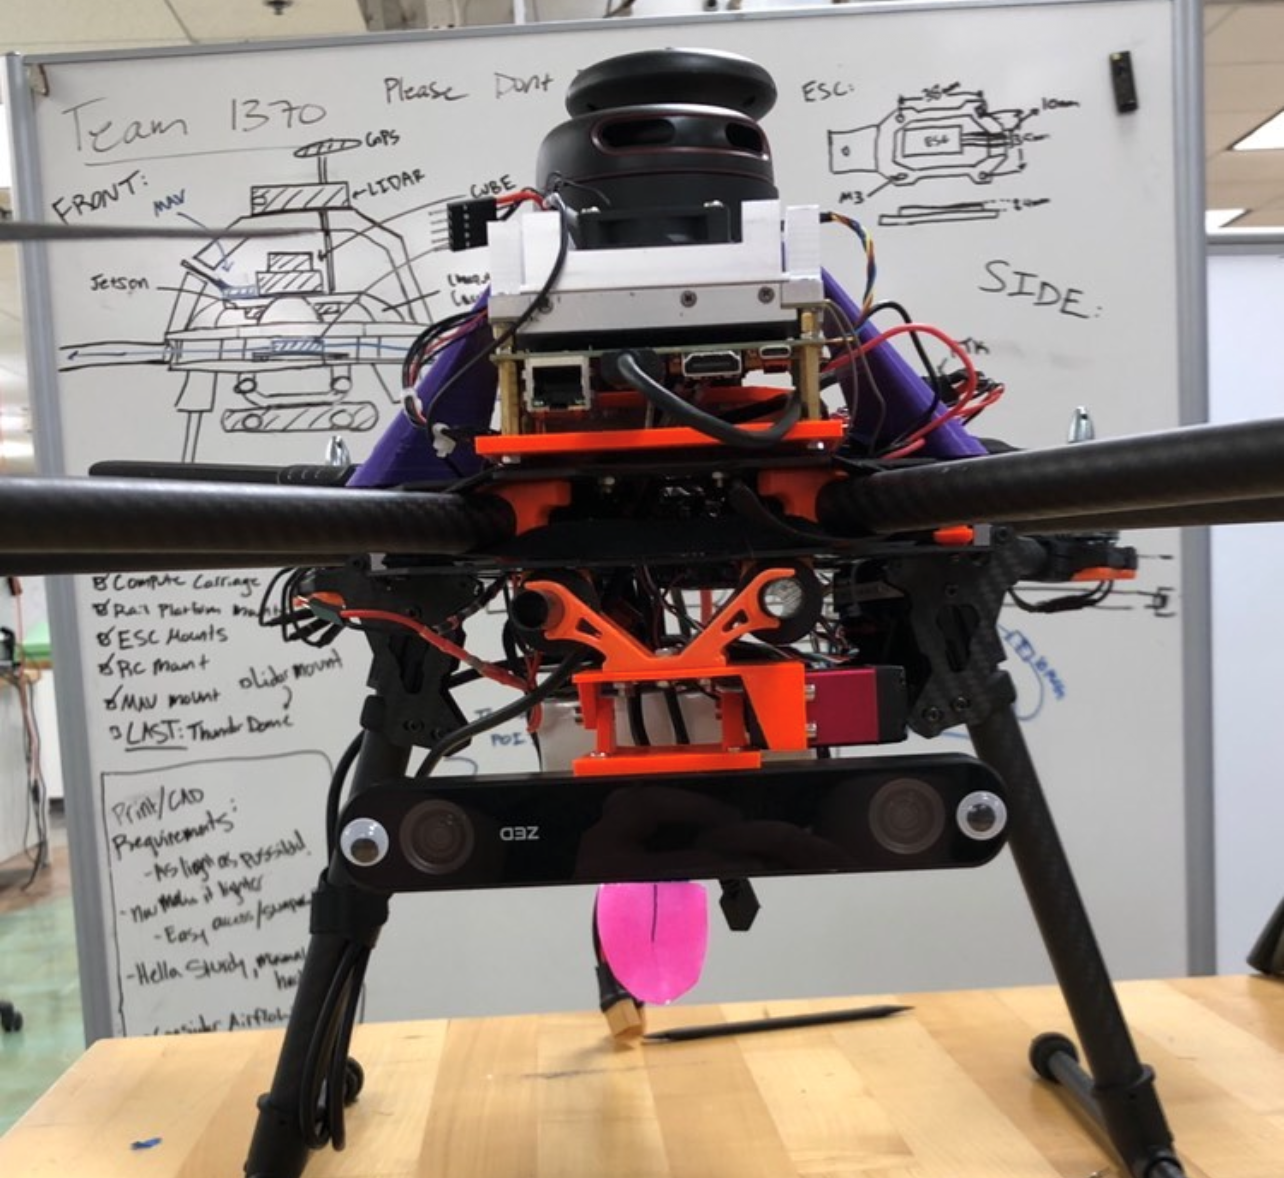
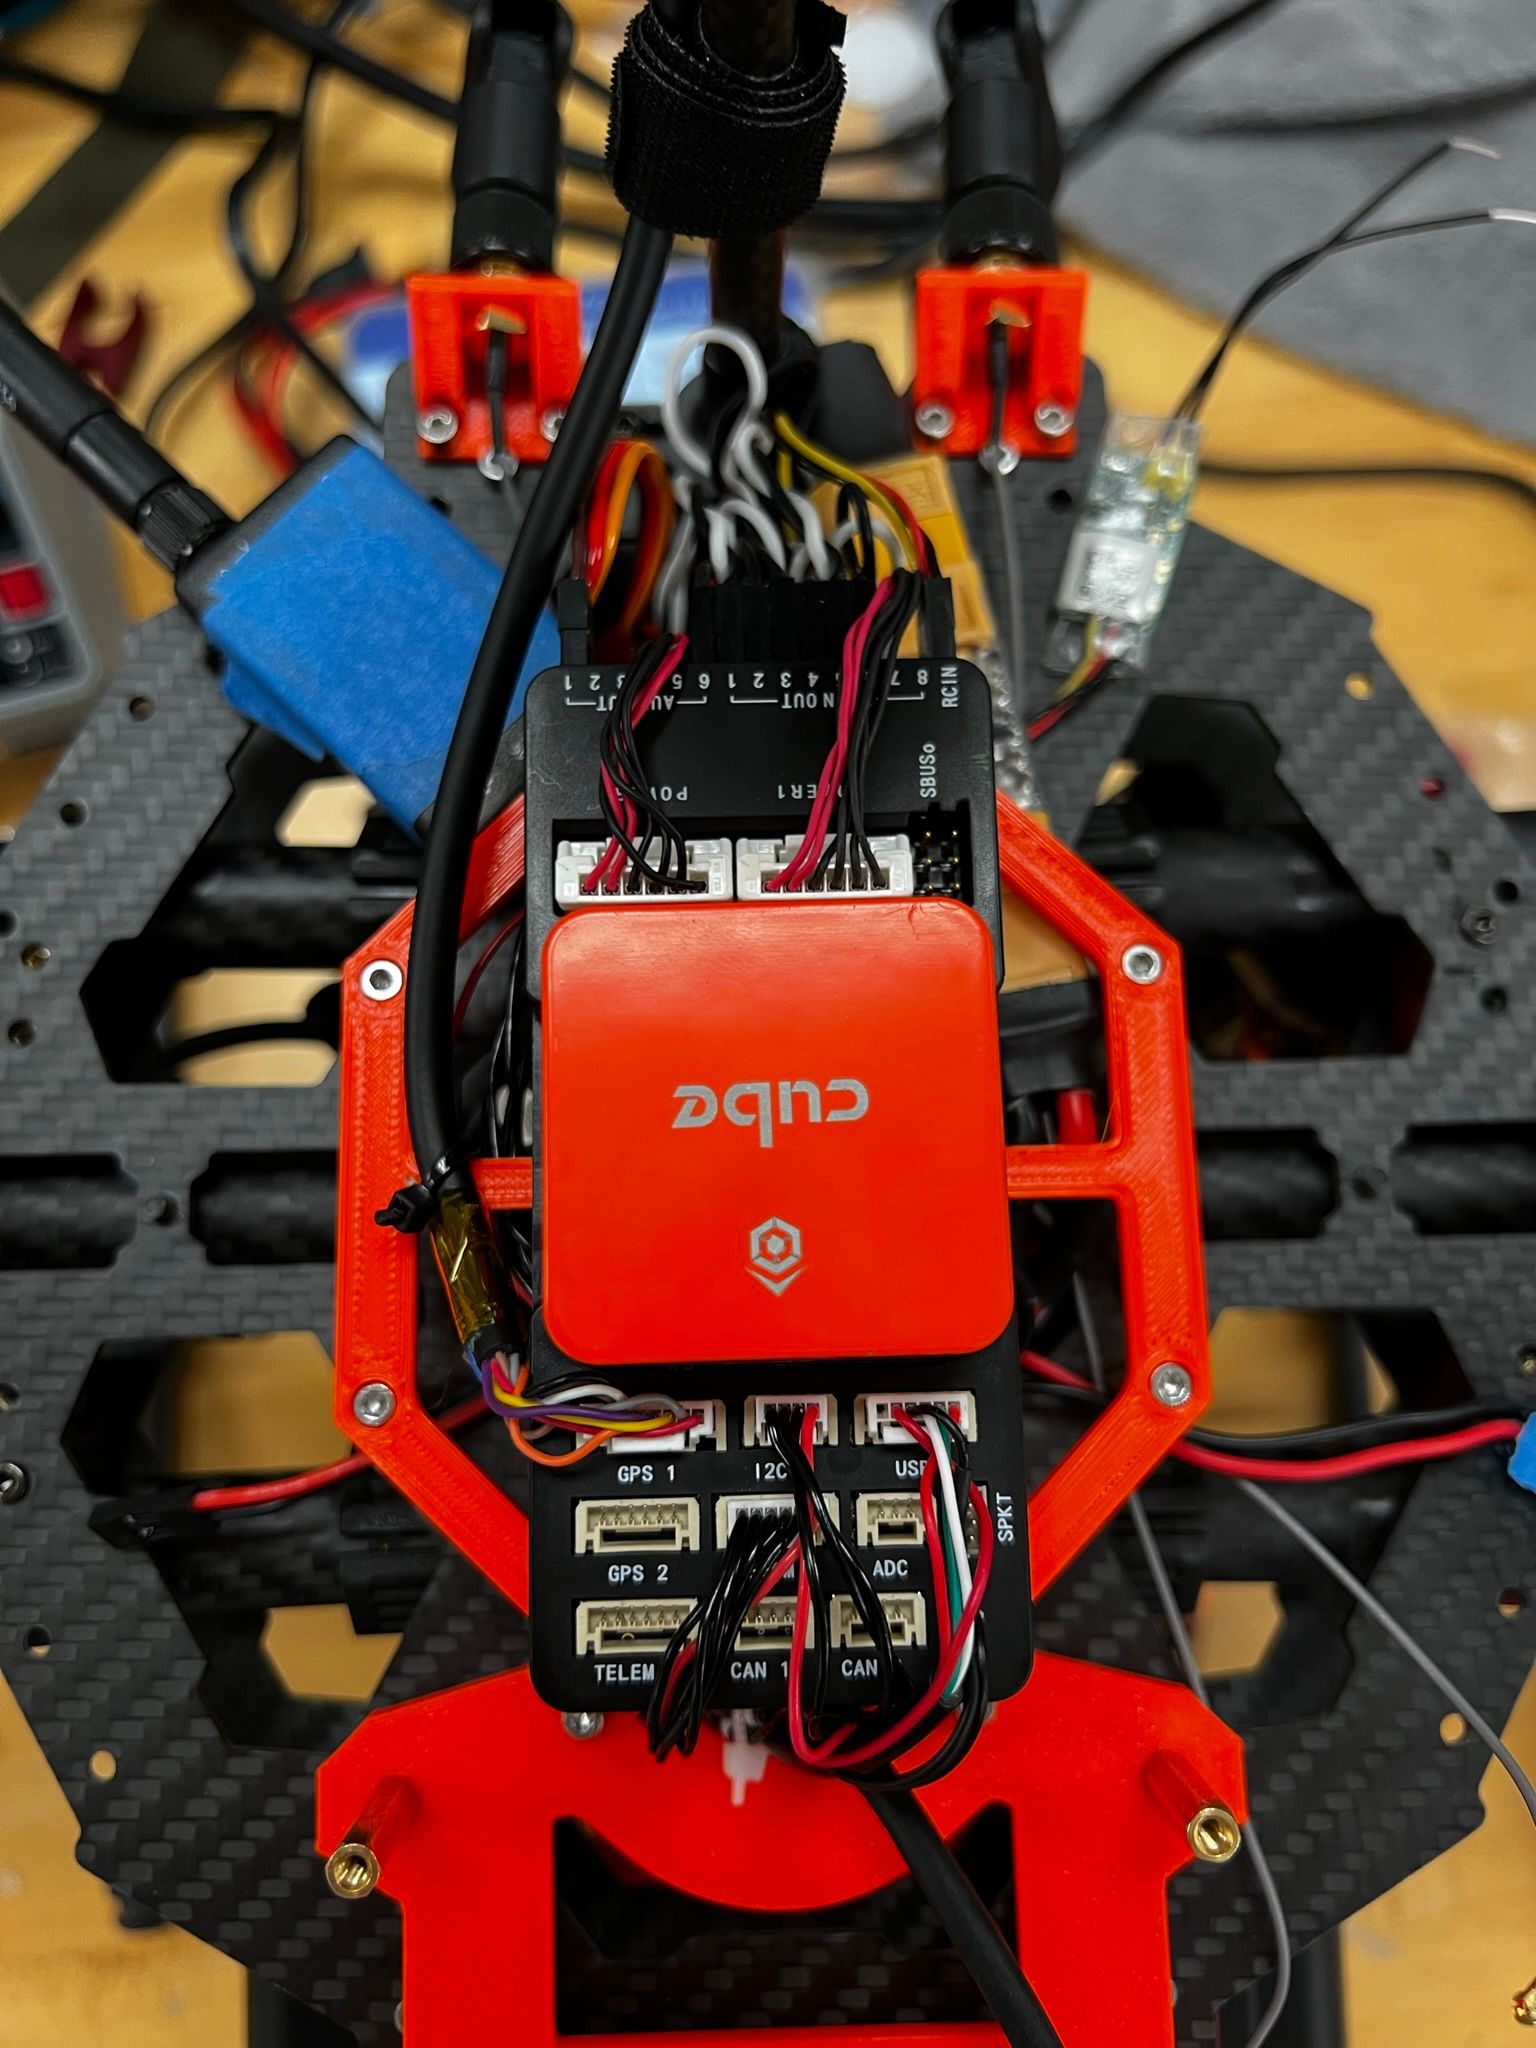
Once we had the parts and wiring sorted out Will and I began building the hex. It took us about 3 full days of work to complete the build. This includes time spent doing CAD to mount various sensors.
Here are some photos and videos from the build:

And now my favorite part, <model-viewer>! In this one, I removed the canopy so you can zoom in all the way. (This is a big model so it may take a bit to load!)
Implementing Challenge 2:
Challenge 2 had the most issues during testing to get working correctly. By the time we were able to flight test Challenge 2, it was ~6 weeks before the competition.
First, we had to adapt the simulation script to our actual drone, which means we need to use the ZED and articulate it to the right positions. Once we got this working, we ran into issues detecting the logo's pink border hue while flying. It turned out to be very sensitive to getting the right hue color for OpenCV detection. First, we thought our hue colors or tolerances were wrong but later on figured out it was the camera itself. We started calibrating the camera's exposure and contrast correction to have consistent hue detection with automatic values but quickly turned to getting our own datasets to operate in certain weather conditions.
The weather and sun played a huge role in this issue, if we calibrated for an overcast, one change in sun brightness could mean we weren't detecting our hue anymore. If we had more time we could've integrated some form of automatic calibration into our script but because of the time crunch, we had to rely on manual tuning.
Second, there were a large number of small bugs with the script, and some quality of life improvements to be made on the script to change certain things like camera angle, hue, camera settings, camera recording (for later investigation), and so on.
By late March/early April, we had a viable MVP for challenge 2. Our drone detected the logo and landed on (near) it.
You may notice we were only operating on a quarter of a football field, this is because our SOW changed at this time to only search a quarter instead of half.
After this, we shifted our focus to getting more accurate landings. This was achieved by two things: Ardupilots precision landing parameter modifications and some GPS coordinate averaging to get as close to the center as possible.
Ardupilot parameter changes required us to disable/modify the balance between using the camera and accelerometers to know whether the drone was centered or not. This just took trial and error until we got a good blend using the Kalman filter.
We also added a system to wait to get 30 Aruco logo views, average their positions, move over that location, then begin landing. This increased our logo landing accuracy to about a foot radius from the logo.
Implementing the ZED for Challenges 3 & 4:
For these challenges, we knew we wanted to use the ZED 2's Visual Odometry in Ardupilot to control the drone without a GPS. The theory was if it worked without a GPS it would only work better with one.
We didn't focus as heavily on this because we knew we had a backup LiDAR solution that would work for at least Challenge 3.
To actually use the ZED we had to use ROS (Robot Operating System) to take the ZED data and translate it to MAVLink (Ardupilot language). This task was handled mainly by Sean Njenga and Ian Falk. They worked on two different ZED systems, one for using the ZED with distance messages as obstacle avoidance and another for using the ZED's various sensors and SDK to get visual odometry fed into the flight controller for GPS denied flights.
The ZED obstacle avoidance with distance messages broke up the depth map provided by the ZED into 9 equally sized grid squares, similar to the rule of thirds. Our script then gets the closest target in the grid square and sends that data to the flight controller which can then interpret how close an object is to it.
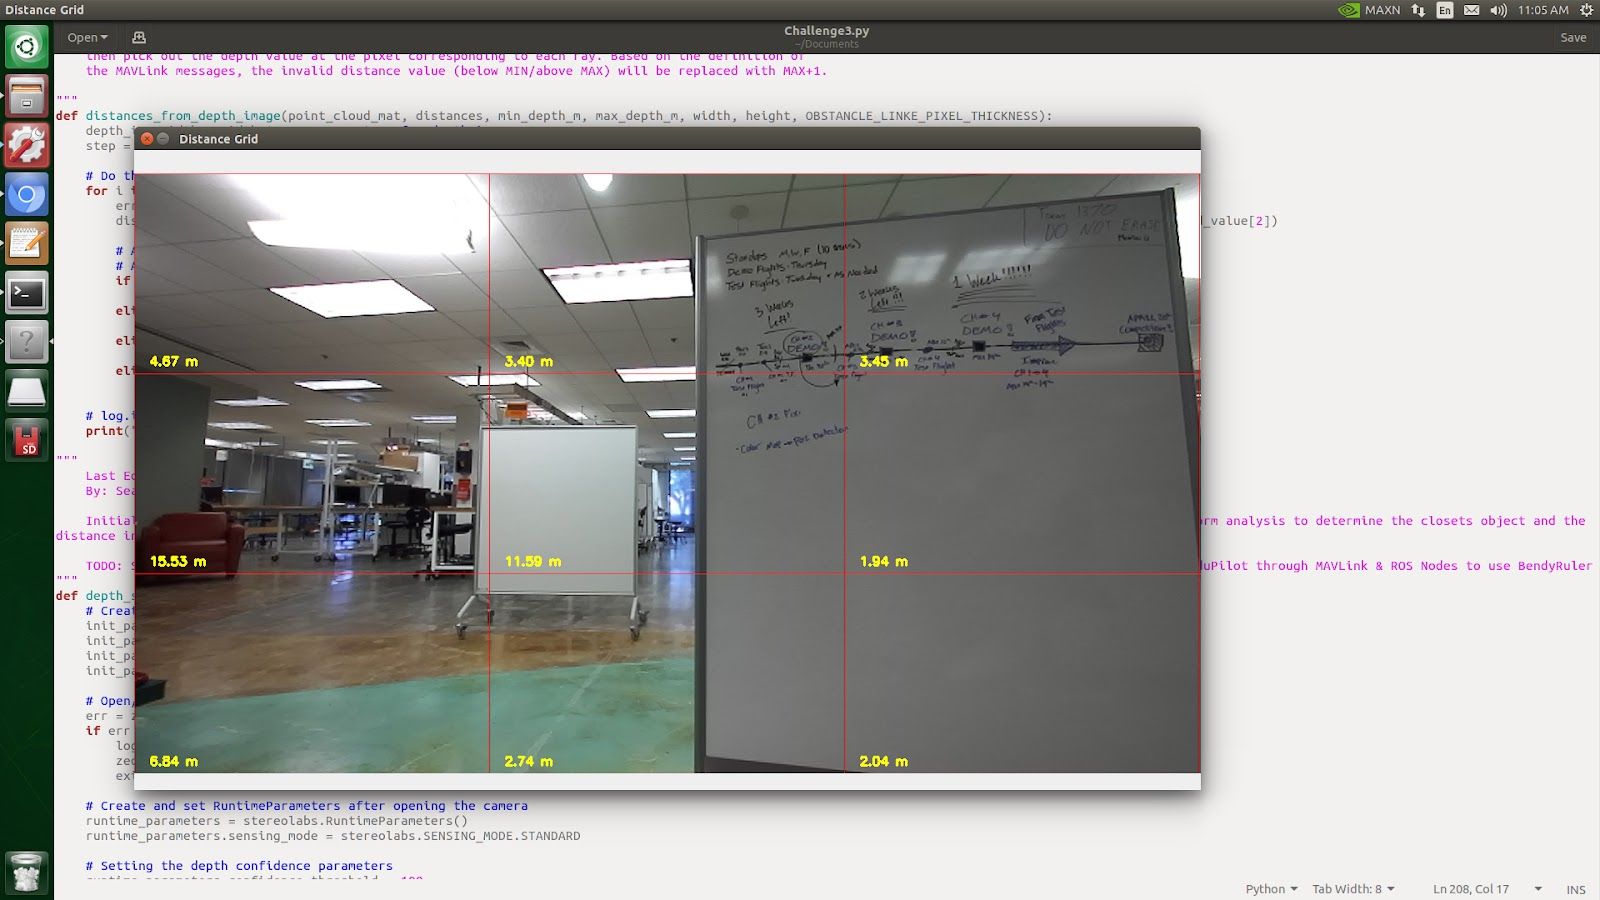
This worked well for Ardupilot's natural obstacle avoidance instead of the LiDAR but it could only see roughly 110° in front of the drone.
The other system was the Visual Odometry via ROS bridge. We specifically used the ZED wrapper and MAVROS to translate the ZED data into MAVLink messages. We were successful in replacing the GPS with this system but there were some unforeseen side effects.
The downside of this process (that we later learned) is that we lose any ability to use an obstacle sensor on the drone, and we can no longer use the TX2 to run scripts on the drone because its serial link was occupied sending Visual Odometry data. It also required a large amount of EK3 parameters to be changed on the Flight Controller which can be detrimental to flying as a whole.
Last-Minute Preparations and Changes before the Week of the Competition
LiDAR: After some more sun interference with the RPLiDAR A2 we bit the bullet and bought a Lightware SF45/B 350° LiDAR. This LiDAR also integrated into Arudpilot natively, saved us a ton of weight, and was much higher quality (at a much higher price) with no sun interference.
Getting the Team Ready: Will and I sat down and planned all of the tasks each team member would need to do on competition day since we were on a time constraint for each challenge. These tasks ranged from monitoring/swapping batteries, standing by with spare parts, communicating with ground control, and various other tasks.
Documentation: I wrote out how to operate the drone from beginning to end, starting with how to pack the flight bag and toolbox correctly. This master document doubled in size from 15 pages to just over 30 after the drone operation was updated and completely outlined. It contains everything you need to install the TX2 OS and software, manage batteries, operating challenges, and more. It was vital in training team members in proper operating procedures.
Code Review: Our Github was organized chaos, each subteam had a branch or two they developed out of. Before we got into the competition week I merged all of our various Challenge development branches into our main branch. I also made sure all of our Challenge scripts still ran correctly after the massive reorganization.
Last Updated: 5/10/2022